

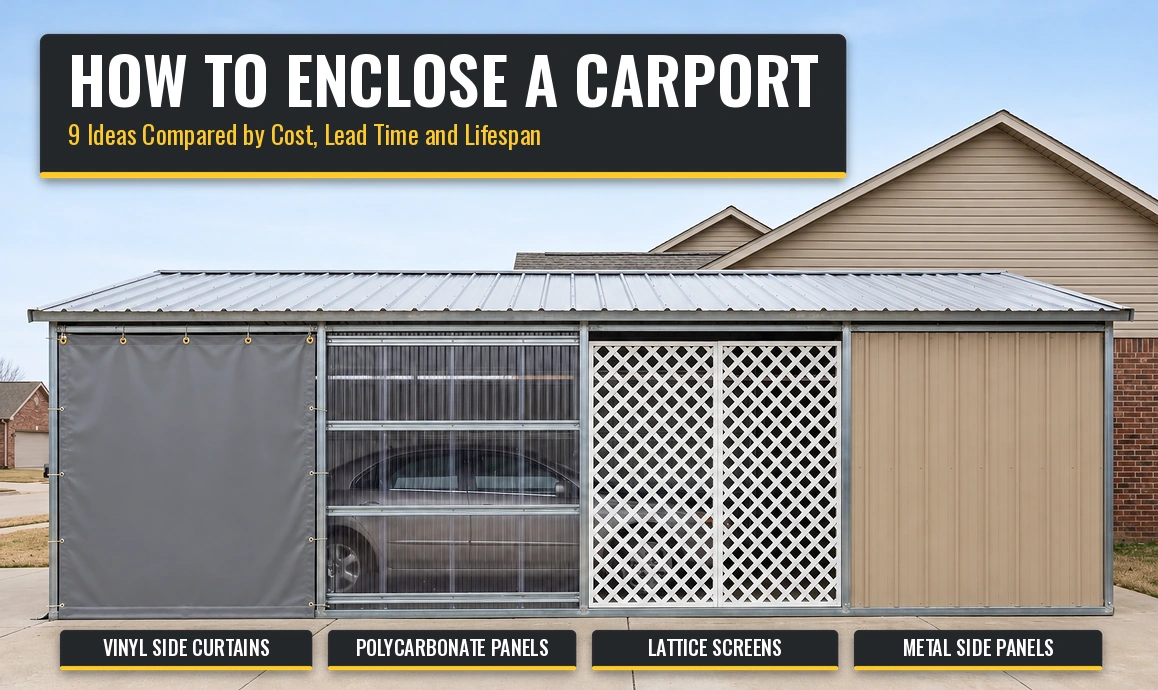
You have nine different ways to enclose a carport; you can start with a $50 tarp today, then move to an over-$25,000 garage conversion. What you want to stop, whether rain, wind, sun, bugs, or thieves, will determine the right one to choose. The ideas below, gives install time, lifespan, lead time, and estimated cost that you can use to make a side-by-side comparison.
All prices are US estimates for 2026 for just one 20 ft long x 8 ft tall side (160 sq. ft.). However, the permit fee, local labor, and materials vary. So for any job you hire out, you can use them as your starting point.
Quick Picks
- Most affordable and quickest: You can use a tarp as it's the quickest and most affordable.
- Removable weather walls: Custom vinyl side curtains can be rolled up whenever you do not need them.
- Sun cover and privacy: Roll-down shades or lattice are a great cover for a patio or carport.
- Insect free space: Screen walls let you enjoy the space without bugs.
- Sunlight retention and rain prevention: Polycarbonate panels offer protection without making the area too dark.
- Long lasting and closeable: Metal side panels or frame walls with a garage door are ideal if you want a long lasting and closable space.
Compare All 9 Carport Enclosure Methods
| Method | Est. Cost Per Side | DIY? | Lead Time | Lifespan | Blocks Rain And Wind |
|---|---|---|---|---|---|
| 1. Tarps | $30 - $120 | Yes, 1 - 2 hrs | Same day | 1 - 2 years | Partly |
| 2. Canopy enclosure kits | $65 - $400 (full kit) | Yes, 1 - 2 hrs | 1 - 7 days | 1 - 3 seasons | Partly |
| 3. Custom vinyl side curtains | $210 - $320 | Yes, 1 - 3 hrs | 12 - 20 work days | 5+ years (5-year warranty) | Yes |
| 4. Roll-down shades | $300 - $4,000 | Manual: yes | 2 - 6 weeks | 7 - 15 years | Sun and some wind |
| 5. Lattice or slat screens | $300 - $7,000 | Lattice: yes | In stock | 10 - 20+ years | Partly |
| 6. Screen walls | $500 - $1,100 | Yes, 1 - 2 days | In stock | Mesh 5 - 10 years | No |
| 7. Polycarbonate panels | $650 - $3,000 | Yes, 1 - 2 days | In stock - 1 week | 10 - 20 years | Yes |
| 8. Metal side panels | $800 - $2,500 | Kits: yes | 1 - 12 weeks | 20+ years | Yes |
| 9. Framed walls / garage | $10,000 - $40,000 (whole carport) | No | 1 - 3 months | Decades | Yes |
Estimated 2026 US prices for one 20 ft x 8 ft side, materials plus typical labor where noted. Get local quotes before you buy.
Sources: Walmart canopy sidewall kit, Walmart steel carport enclosure, Tractor Supply polycarbonate panel, Inch Calculator screen porch costs, Inch Calculator garage door costs, AA Metal Buildings conversion costs, Bob Vila garage costs, and our own carport curtain price calculator.
Check These Before You Enclose a Carport
- Permits and HOA rules: You do not necessarily need a permit for removable options like curtains, tarps, and screens, but you will need a permit for metal panels or garage conversion. Confirm from your local building department and HOA first before you start any work.
- Wind Resistance: Make sure your carport frame and anchors are strong enough to handle extra pressure because adding walls can make it catch the wind like a sail. And if necessary, you can add anchors for extra stability.
- Ventilation and moisture: An enclosed carport can trap moisture and cause condensation. So ensure you leave a small gap at the top or bottom, or install vents to keep the space dry and protect your car and other stored items.
- Exhaust: Exhaust fumes can be dangerous; do not run a car engine or generator in a closed carport. Make sure the area is open before you start your vehicle.
- Access: Think about how you will get in and out of the space. You could add a zipper door, a roll-up flap, or leave one end open for easy access.
Idea 1: Hang Tarps

To cover the side of a carport, you can use poly or canvas tarps, as they are the cheapest way to do that. Whether you need protection during a storm, through the winter, or while working on a short-term project, they remain a practical option for temporary use.
Best For
- Best for short-term and urgent use
- Suitable for strict budgets.
- Ideal for loaners who can’t make changes
Est. Cost
$30 - $120 per side
Install
DIY, 1 - 2 hours
Lead Time
Same day
Lifespan
1 - 2 years
Pros
- It’s the most affordable option available
- You install them in a day without any tools
- You can easily remove and reuse them
Cons
- They look untidy and short-term
- They can be detached and tear in strong wind
- The plastic can be weakened under the sun in one or two years
- They hardly fit the provided space
Install Considerations
- Sizes purchased in stores scarcely fit perfectly, leaving spaces or excess material.
- Normal plastic tarps weaken under the sun, and their grommets can tear in strong wind.
- Secure the tarp by tying every 2 ft. to 3 ft. of it to prevent it from detaching and rubbing against the frame.
Idea 2: Use a Canopy Enclosure Kit

Portable carports come with optional sidewall kits that include zippered doors. They attach to the existing frame.
Best For
- Compact fabric carports
- Temporary storage for vehicles, boats, or lawn equipment
- Quick, affordable entire enclosure
Est. Cost
$65 - $400 for a full kit
Install
DIY, 1 - 2 hours
Lead Time
1 - 7 days shipping
Lifespan
1 - 3 seasons
Pros
- Covers the four sides in a single box
- Includes a built-in zipper entry
- It is affordable and quick to assemble
Cons
- Designed for specific models and carport sizes
- Lightweight fabric may wear out and get torn
- It is not suitable for carports with a solid roof
- Leaving gaps to the ground is common with some kits
Install Considerations
- Check the compatibility before buying, as each kit is made for a particular carport model and size. For example, this sidewall set for one 10 x 20 ft fabric carport costs around $65.
- Many kits use light polyethylene, which tends to wear out more quickly than vinyl.
- Measure the height of your carport before you buy to make sure that the kits reach the ground.
Idea 3: Install Custom Vinyl Side Curtains

Customized carport side curtains are durable vinyl panels, customized to the specific size to fit each opening. They attach to the frame with ties, snaps, or twist locks and help to keep out rain, wind, and sunlight. You can roll them up or remove them when you do not need them.
Best For
- Protection from weathers like winter and storms with no permit needed.
- You can attach a carport of any size, both for metal or woods.
- For owners who want the option to open their carport on sunny days.
Est. Cost
$210 - $320 per side
Install
DIY, 1 - 3 hours
Lead Time
12 - 20 work days (rush 7 - 10)
Lifespan
5+ years, 5-year defect warranty
Pros
- Custom size for a precise fit of the specific space
- It helps protect against rain, wind, sunlight, and even snow.
- You can easily open, roll up, or remove them.
- In most places, you do not need a permit.
- They include a 5-year warranty against production defects
Cons
- More expensive than a standard tarp
- Production usually takes 12 - 20 working days
- Does not provide secure, lockable protection
- Tying it firmly is needed in strong wind
Install Considerations
- For instance, a solid vinyl curtain measuring 20 x 8 ft costs around $240. Adding a zippered roll-up door costs about $125.
- Ensure you measure each opening of the curtain carefully so that it fits correctly.
- Choose from solid vinyl, clear panels, a combination of solid and clear vinyl, or mesh for good airflow.
- The 18 oz vinyl is designed to withstand temperatures from -20F to 160F. You can also add a zipper or roll-up door to provide easy access.
- Add on top, at the sides, and at the bottom in areas with strong winds. You can also roll up the curtain before severe storms come to reduce the risk of damage.
Idea 4: Add Roll-Down Outdoor Shades

Roll-down solar shades are installed to the top of a carport, and you can lower them with a crank or motor. They help to reduce sunlight, glare, and wind, then roll away whenever you are not using them.
Best For
- You can use a carport as a seating area
- Area with strong sunlight and hot weather
- A neat, modern appearance.
Est. Cost
$300 - $1,000 manual, up to $4,000 motorized
Install
Manual DIY, motorized by a pro
Lead Time
2 - 6 weeks
Lifespan
7 - 15 years
Pros
- A completely neat appearance
- It reduces sunlight, hotness, and glare.
- You can roll them up when you don’t need them.
- Motorized model, just at the touch of a button.
Cons
- Mesh allow rain and cool air to pass through.
- The motorized models are more expensive.
- You need a strong beam to install them.
- Many sway in strong winds without side supports.
Install Considerations
- Many fabric shades are mesh, they allow cool air and rain to gain entry.
- To install the housing, you need a strong beam or top.
- You may need up to two shades and a support post for wind openings.
Idea 5: Build Lattice or Slat Privacy Screens

Adding wooden or vinyl screens between the posts helps in keeping the vehicle hidden, but make sure there is airflow. Vinyl lattice or horizontal wood can help you create a private open-sided carport.
Best For
- Improve carport privacy and appearance
- Carport built alongside the home
- Restricting visibility while keeping the area open
Est. Cost
$300 - $800 lattice DIY, $3,000 - $7,000 pro slat wall
Install
Lattice DIY in 1 day, slats by a pro
Lead Time
In stock at most lumber yards
Lifespan
10 - 15 years wood, 20+ vinyl
Pros
- Makes the carport more private and neat
- Allows the circulation of air
- Can be a straightforward lattice DIY project
- You can use vinyl for more than two decades
Cons
- The open space offers limited bad weather protection
- Painting or staining is required for wooden screen
- Professionally built slatted walls increase costs
- Post loads are increased
Install Considerations
- Spaces between the panels allow access to snow and wind
- Every few years, it is required for wood to be painted or stained
- You may need additional support to keep the panel secure and straight
Idea 6: Screen It In

Mesh screens fitted over wooden or aluminum frame or ready-made panels changes the carport into an enclosed sitting area. To screen an existing carport typically costs $5 to $7 per sq. ft. installed.
Best For
- Create a comfortable space with no insects
- Provides suitable weather
- Affordable screen option per square foot
Est. Cost
$500 - $800 DIY, $800 - $1,100 hired
Install
DIY, 1 - 2 days
Lead Time
In stock
Lifespan
Mesh 5 - 10 years, frames longer
Pros
- Prevents insects and leaves from entering
- Requires little cost to install
- Allows the circulation of air during hot weather
- Makes the carport useful for more things
Cons
- No protection from rain, wind, or cold weather
- Pets and severe weather can rip the mesh
- Screen door is required
- Does not provide much private space
Install Considerations
- Mesh keeps insects and leaves out but does not protect from bad weather
- A screen door is required to give you access
- Fiberglass mesh can easily tear when exposed to pets and storms. So you need to use stronger pet-resistant screen where extra durability is required
Watch: How I Turned My Carport Into a Screened-In Porch
Idea 7: Fasten Polycarbonate Panels

Foldable or double-layer polycarbonate sheets can be attached to a wood or metal frame between carport posts. They help keep rain and wind out while allowing natural light into your space.
Best For
Est. Cost
$650 - $1,000 DIY, $1,500 - $3,000 hired
Install
DIY, 1 - 2 days
Lead Time
In stock to 1 week
Lifespan
10 - 20 years
Pros
- Protects the carport from rain and wind
- Allows the entry of daylight
- Readily available panels at an affordable price
- Durable for one to two decades
Cons
- Requires an additional support between posts
- If they are drilled incorrectly, they could crack
- May heat up under direct sunlight
- No privacy with transparent sheets
Install Considerations
- For 2 to 3 ft spacing, you need to fit a horizontal support across the frame.
- Drill holes carefully and use the recommended screw for sealing to prevent cracks in panels.
- Leave small gaps around the edge because panels expand in hot weather.
- In areas with excess sunlight, tinted or opal panels can help you reduce heat compared to clear sheets.
Watch: Polycarbonate Clear and Translucent Panels
Idea 8: Add Metal Side Panels

You can attach steel wall panels to a metal carport frame to create a solid wall. They may come with the original carport kit or be installed later by a dealer. This is the most well-known way to close up a steel carports completely.
Best For
- Carport with metal frames
- Provides durable walls with minimal maintenance.
- Provides better security and protection from bad weather
Est. Cost
$800 - $2,500 per side
Install
Kits DIY, custom sides by a dealer
Lead Time
1 week (kits) to 12 weeks (dealer)
Lifespan
20+ years
Pros
- Complete protection from bad weather
- Can endure for more than 2 decades with little maintenance
- Gives the carport a consistent finish
- Provides better security than fabric cover
Cons
- A permit may be required
- Puts extra wind and snow pressure on the frame
- Rain can make the panel noisy, and sweat can build up from within
- It may take time to get the panels through a dealer
Install Considerations
- Adding solid walls increases pressure from the wind and the weight of snow on the structure. You may need stronger anchors and updated certification.
- Permit is usually required, especially if you convert the carport into a garage.
- Metal panels can be noisy during rainfall and may develop moisture within. Adding ventilation or insulation can help you manage this issue.
Watch: Turning a Carport Into a Garage
Idea 9: Frame Walls or Convert It Into a Garage

The finished space can include a garage door, a regular entry door, or windows. This converts the carport into a garage or an enclosed room. Converting a metal carport into a garage typically costs $10,000 to $40,000, while siding prices range from $0.70 to $18 per sq. ft. often depends on the material.
Best For
- Creates a secure garage that you can lock
- Increasing the home’s value
- More space for storage or workshop activities.
Est. Cost
$10,000 - $25,000 single, $20,000 - $40,000 double
Install
Contractor
Lead Time
1 - 3 months with permits
Lifespan
Decades
Pros
- Provides a fully secure garage space
- May increase the home’s worth
- Offers complete protection from the weather
- Can be fitted with insulation, electrical outlets and lighting
Cons
- Costs more than other options
- Requires permits, building plans, and inspection.
- Construction can take one to three months.
- May increase taxes of property.
Install Considerations
- Mostly always require permits, approved plans, and inspection
- You may need additional foundation, as existing carport posts and the slab may not support walls.
- Garage door typically costs around $850 to $3,800 installed
- If the garage connects to the house, it increase taxes; it must also comply with local setback and fire safety requirements.
Common Questions About Enclosing a Carport
Can you enclose an existing carport?
Yes. You can enclose most carports by attaching curtains, screens, or wall panels to the existing post frame. Before you install solid walls, make sure the structure and its anchors can support the added wind pressure. Check local building rules to confirm if a permit is required.
What's the cheapest way to enclose a carport?
Tarps are usually the least expensive option, costing around $30 to $120 per side, but they can only last for one or two years. But for customized vinyl curtains, they provide a better fit and last for many years. If you want to keep insects out, screen walls are an affordable choice.
What is the average cost of enclosing a carport?
From $100 for a basic tarp to $40,000 for a complete garage conversion. Removable curtains, screens, and polycarbonate panels can cost from a few hundred to several thousand dollars per side. Steel with panels typically costs $800 to $2,500 per side.
How do I temporarily enclose a carport?
You can use tarps, removable side curtains, or a canopy sidewall kit. These are usually attached with hooks, snaps, or elastic cords, making them easy to remove without tools. You can also roll up vinyl curtains and secure them to leave the side open.
Do I need a permit to enclose an existing carport?
Yes, you most times need a permit for permanent walls, steel panels, or a full garage conversion. Temporary options, such as tarps, screens, and removable curtains, may not need one. Requirements differ by location and HOA, so confirm with your local building department before you start work.
How do I cover the sides of a carport?
You can attach different materials between the carport posts. Tarps and vinyl curtains are suitable for temporary coverage, while screens help keep insects out. Polycarbonate sheets allow daylight while blocking rain, and steel panels provide a solid barrier against bad weather and unwanted access. Your choice depends on what you want to protect against.